Managing your AWS organization in Terraform
Partitioning your cloud infrastructure across different AWS accounts is a best-practice that makes achieving the AWS Well Architected pillars significantly easier. By isolating resources in separate accounts you get a lot of benefits for free. A rogue lambda recursively invoking itself in your staging environment would ordinarily exhaust your account’s concurrent lambda execution quota and kill production, but if staging and production are separate AWS accounts then they get separate account-level quotas.
The downside of running with multiple AWS accounts is that they can be complicated to set up and manage. AWS Organizations—the service used to create and manage subaccounts—is intimidating the first time you open it up, and it’s easy to make mistakes the first time you go to set up an account hierarchy.
Infrastructure-as-code tools help out a lot here by streamlining and systematizing the configuration of AWS Organizations. Configuring your baseline organization can be done in only a few minutes, and from there adding new accounts can be done with only a few lines of code if you set it up right. Assuming you're checking in your IaC to source control, you'll even get an audit log for free in the form of commit history.
This post will show you how to set up AWS Organizations and SSO using Terraform.
Opt in to AWS Organizations
The first thing we’ll do is create an empty organization resource:
resource "aws_organizations_organization" "root" {}If you’ve never touched AWS Organizations before, then this will go without a hitch and you can proceed straight to step 2.
Otherwise, if you’ve already set up an organization via ClickOps or a different bit of IaC (like me!) then you’ll get an error message like the one below. In this situation there are two paths forward.
╷
│ Error: creating organization: AlreadyInOrganizationException: The AWS account is already a member of an organization.
│
│ with aws_organizations_organization.root,
│ on main.tf line 28, in resource "aws_organizations_organization" "root":
│ 28: resource "aws_organizations_organization" "root" {}
│
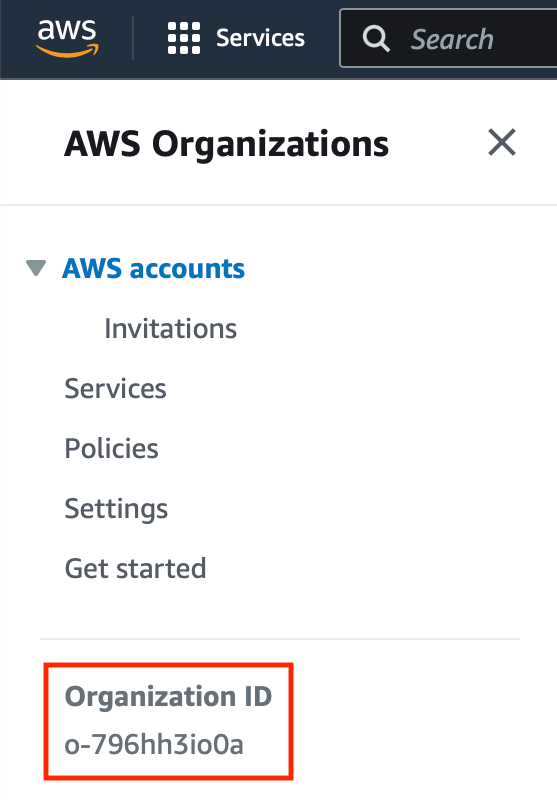
╵If you set up AWS Organization via ClickOps, then the best option is to run a terraform import command to bring the organization under control of Terraform. All you need for this is the organization’s ID, and you can find that info in the sidebar of the AWS Organizations section of the AWS Console. In my case, I would run terraform import aws_organizations_organization.root o-796hh3io0a.
If there’s a different piece of IaC at play which configures your organization then it’s best not to import the resource. It’s not a good idea to have two tools fighting each other for control of something, so the best solution is to use the aws_organizations_organization data source like so:
data "aws_organizations_organization" "root" {}Regardless of which option you select, you’ll need to grab the root organization ID. AWS accounts and organizational units are hierarchical in nature, and the root organization is what sits at the top of the hierarchy. The first layer of your organization will therefore use the root organization ID as a parent ID.
# Resource block
locals {
  root_organization_id = aws_organizations_organization.root.roots.0.id
}

# Data source
locals {
  root_organization_id = data.aws_organizations_organization.root.roots.0.id
}
Set up an identity source
While you don’t necessarily need to do this step, I highly recommend it. An identity source is used by AWS SSO to manage SSO users, allowing you (or anyone else in your organization) to sign in with a single set of credentials and then select the account you want to access (and have permissions for) from a nice list of accounts. It’s a lot easier than juggling credentials for multiple accounts.
There are a few different identity source options, but we’ll use AWS’ “Identity Center” product as it’s both the simplest option and free to use.
Sign in to the AWS Console and navigate to the “AWS SSO” section. AWS SSO is effectively a global service, so you generally don’t need to worry about which region you set it up in assuming you have no data sovereignty considerations.
From there, you’ll want to click the button labelled “Enable AWS SSO.” The page should refresh, and you’ll see a list of recommended actions to take. The first of these steps is to choose your identity source. Click it.
You’ll be taken to another page of the AWS Console with a “Change identity source” button. You’ll want to click on that, and then choose the “Identity Center directory” option. Click next, and then confirm your changes.
Unfortunately there’s no way to perform this step via Terraform, but it’s the only part of this guide which requires you to configure things by hand in the AWS Console. Everything else can be IaCed from here.
Create a subaccount
AWS accounts are hierarchical in nature. The parent of an account is either a “business unit” or the root organization, and business units themselves can be nested within other business units.
Upon hearing that you may be tempted to write a businessUnit Terraform module that takes in an array of environment names and then sets up a business unit and some subaccounts.
I urge you not to do this, because it makes things a lot harder down the line. I’ll elaborate a bit more in the “Bonus points” step, but for now I’ll just say that I think the optimal Terraform setup here is to create aws_organizations_organization resources inline, and then create aws_organizations_account resources using a module.
Let’s create our first business unit. “Rainforest” is an online book store that’s growing fast and making the switch over to IaC:
data "aws_organizations_organization" "root" {}

locals {
  root_organization_id = data.aws_organizations_organization.root.roots.0.id
}

resource "aws_organizations_organizational_unit" "unit" {
  name      = "rainforest"
  parent_id = local.root_organization_id
}
The parent_id argument here can be the ID of another organizational unit if you want to nest things deeply. In this post we’re creating coarse-grained staging and production accounts, but at (large) scale it can make sense to split your accounts across service and regional lines as well.
With a unit set up, we can create an account inside it:
resource "aws_organizations_account" "staging" {
  parent_id = aws_organizations_organizational_unit.unit.id

  name  = "rainforest-staging"
  email = "aws-rainforest-staging@sophiabits.com"

  role_name = "RootAdmin"

  lifecycle {
    # You can't update these things
    ignore_changes = [name, role_name, email]
  }
}

resource "aws_organizations_account" "production" {
  parent_id = aws_organizations_organizational_unit.unit.id

  name  = "rainforest-production"
  email = "aws-rainforest-production@sophiabits.com"

  role_name = "RootAdmin"

  lifecycle {
    # You can't update these things
    ignore_changes = [name, role_name, email]
  }
}
Grant access permissions
We have a new subaccount, but getting access to it is very inconvenient. We don’t really want to store N sets of IAM user credentials in our password manager, nor go through the AWS login page more times than we need to.
AWS SSO allows us to sign in once and access all of our available AWS accounts through a convenient list. In AWS SSO, users are managed by an “identity provider,” and permissions are attached to those users through IAM Identity Center. The simplest identity provider is identity store—we set it up earlier—which allows you to create SSO users with username + password credentials.
We can create our first SSO user like so:
data "aws_ssoadmin_instances" "this" {}

locals {
  identity_store_arn = tolist(data.aws_ssoadmin_instances.this.arns)[0]
  identity_store_id  = tolist(data.aws_ssoadmin_instances.this.identity_store_ids)[0]
}

resource "aws_identitystore_user" "sophia" {
  identity_store_id = local.identity_store_id

  display_name = "Sophia Willows"
  user_name    = "sophia"

  name {
    given_name  = "Sophia"
    family_name = "Willows"
  }

  emails {
    primary = true
    value   = "hello@sophiabits.com"
  }
}
After creating your user you’ll want to confirm their email address. It’s possible to assign permissions to the user at this point, but you can’t turn on MFA without a verified email which is a big security limitation. Patch up that hole before granting any permissions!
To verify the user’s email you’ll need to sign in to the AWS Console, navigate to your newly-created user, and click the “Send email verification link” button. After confirming, your user should receive an email from AWS with a link they can click to verify their email. After doing that, they’ll be able to set up MFA.
With our security posture improved, we can grant our user access to the accounts we made. You could easily add an owners input variable to your AWS account module to automate this bit better, but for the purposes of this post we’ll define the permissions inline:
resource "aws_ssoadmin_permission_set" "admin" {
name = "AdministratorAccess"
instance_arn = local.identity_store_arn
session_duration = "PT1H"
}
resource "aws_identitystore_group" "all_access" {
identity_store_id = local.identity_store_id
display_name = "AllAccess"
description = "Provides admin access to all subaccounts"
}
resource "aws_ssoadmin_account_assignment" "all_access" {
for_each = toset([
aws_organizations_account.staging.account_id,
aws_organizations_account.production.account_id,
])
instance_arn = local.identity_store_arn
permission_set_arn = aws_ssoadmin_permission_set.admin.arn
principal_id = aws_identitystore_group.all_access.group_id
principal_type = "GROUP"
target_id = each.value
target_type = "AWS_ACCOUNT"
}
resource "aws_identitystore_group_membership" "sophia_all_access" {
identity_store_id = local.identity_store_id
group_id = aws_identitystore_group.all_access.group_id
member_id = aws_identitystore_user.sophia.user_id
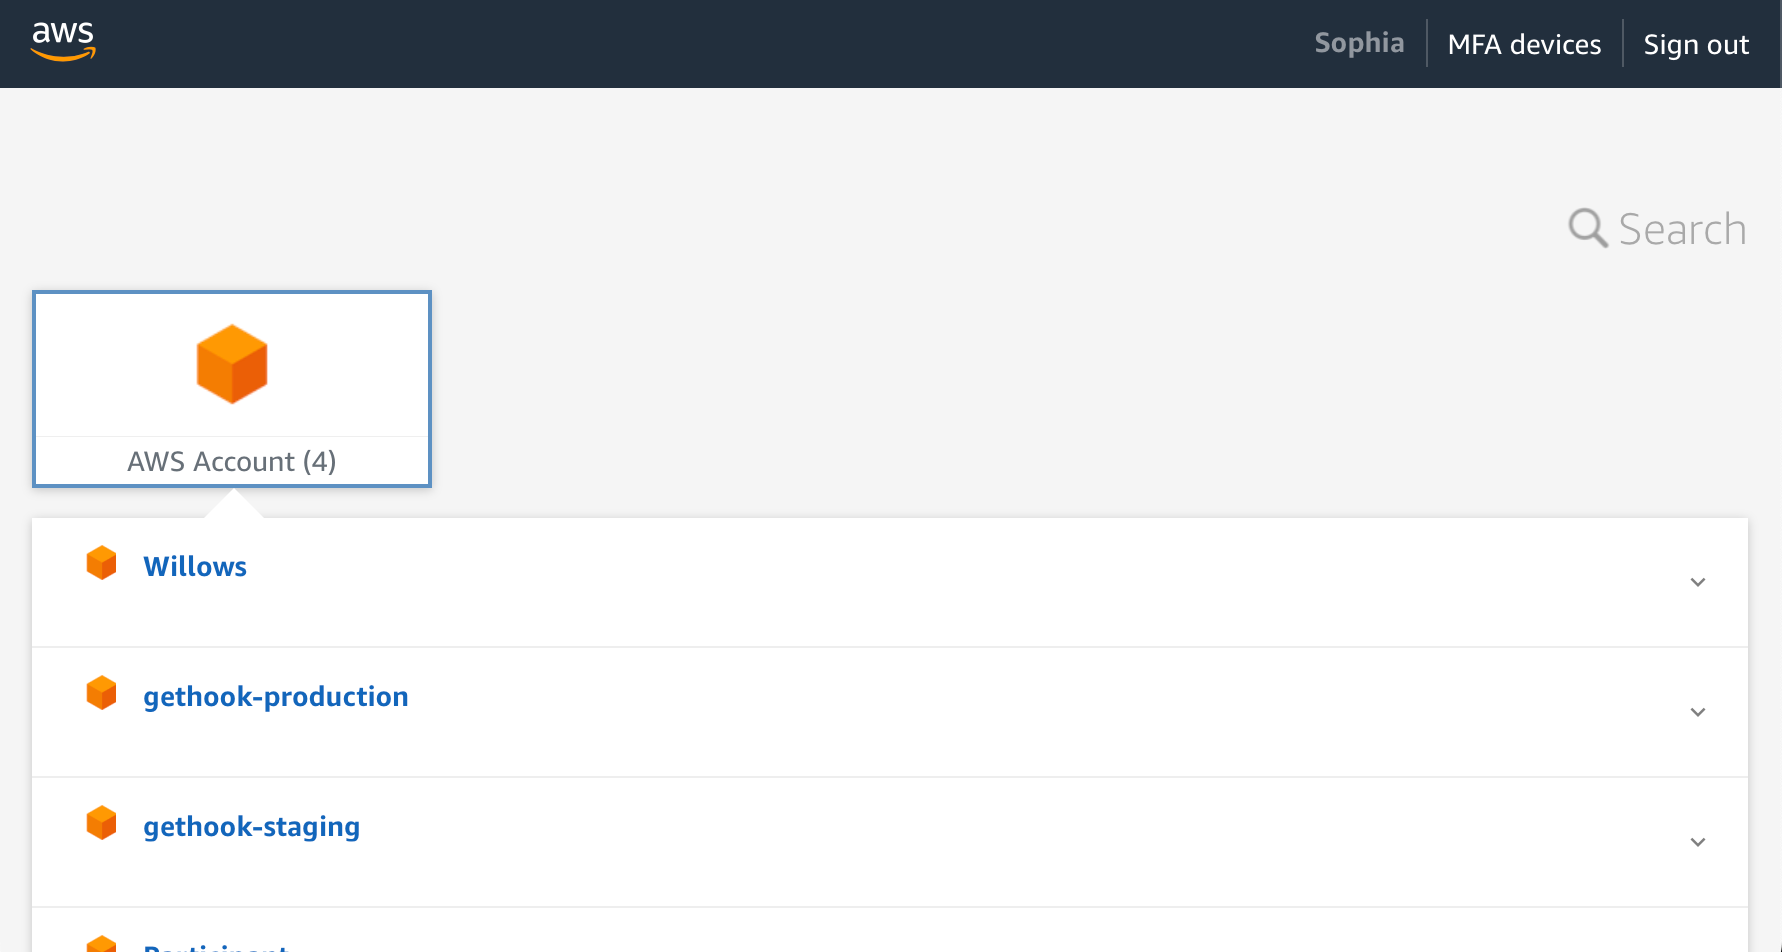
}At this point you can open up your SSO start URL in your browser (it will look something like https://d-XXXXXX.awsapps.com) and sign in using your user’s username and password. All going well, you’ll be greeted with a list of accounts:
Bonus points: Configure your subaccount
At this point you’re done in the sense that your SSO account can access its available subaccounts, but you may want to do a little bit of further configuration before calling it a day.
We’re using Terraform to manage our subaccounts, which means it’s likely you’ll want to use Terraform to provision infrastructure inside said subaccounts. Something I hate about getting started with Terraform is bootstrapping an S3 bucket to store state—you either need to do it via ClickOps, or deal with an annoying chicken-and-egg scenario. It would be great if our subaccounts came preloaded with an S3 bucket for our Terraform state files and a DynamoDB table for state locking.
Fortunately for us it’s pretty easy to get that up and running. The subaccount’s administrator role created by AWS Organizations implicitly trusts the root account, which means we can define an IAM policy in the root account which enables a role or user in the root account to assume that administrator role (or any other role) in the subaccount.
If you’re going to go down this path, I recommend wrapping it all up in a self-contained Terraform module. Setting up resources in your subaccount requires instantiating a new AWS provider instance, and juggling AWS providers can get unwieldy quickly. Stashing this away inside a module means you only ever have two AWS providers to keep in your head at once.
The following code blocks assumes you have a module written which takes the aws_organizations_account resource as an input, but it would also be fine to create some kind of businessUnit module which is responsible for both creating the account and configuring it—it’s up to you.
The only footgun to avoid here is that you absolutely do not want your module to be responsible for creating an arbitrary number of accounts. Terraform’s ability to dynamically address providers is limited. Keeping your modules to only a static number of accounts means you can always statically address your AWS providers which avoids any pitfalls.
With that said, we’ll grant our Terraform user permission to assume roles in the subaccount:
resource "aws_iam_policy" "assume_access" {
  name   = "terraform-assume-${var.account.name}-role"
  policy = data.aws_iam_policy_document.assume_access.json
}

data "aws_iam_policy_document" "assume_access" {
  statement {
    effect  = "Allow"
    actions = ["sts:AssumeRole"]

    resources = ["arn:aws:iam::${var.account.id}:role/*"]
  }
}

data "aws_iam_user" "terraform" {
  user_name = "Terraform"
}

resource "aws_iam_policy_attachment" "assume_access" {
  name = "terraform-assume-${var.account.name}-role-attachment"

  policy_arn = aws_iam_policy.assume_access.arn
  users      = [data.aws_iam_user.terraform.user_name]
}
From here, we can instantiate another instance of the aws provider that assumes the subaccount’s administrator role:
provider "aws" {
  alias  = "child"
  region = "us-east-2"

  assume_role {
    role_arn = "arn:aws:iam::${var.account.id}:role/${var.account.role_name}"
  }
}
And finally we can use that new provider to set up our baseline infrastructure:
resource "aws_s3_bucket" "terraform_state" {
  provider = aws.child
  bucket   = "${var.account.name}-terraform"
}

resource "aws_s3_bucket_acl" "terraform_state" {
  provider = aws.child
  bucket   = aws_s3_bucket.terraform_state.id
  acl      = "private"
}

# Keep old Terraform state files
resource "aws_s3_bucket_versioning" "terraform_state" {
  provider = aws.child
  bucket   = aws_s3_bucket.terraform_state.id

  versioning_configuration {
    status = "Enabled"
  }
}

resource "aws_dynamodb_table" "terraform_lock" {
  provider     = aws.child
  name         = "terraform-lock"
  hash_key     = "LockID"
  billing_mode = "PAY_PER_REQUEST"

  attribute {
    name = "LockID"
    type = "S"
  }

  tags = {
    Name = "Terraform Lock Table"
  }
}
If you wanted to you could go a step further and create an IAM user (or role) for Terraform to use within the subaccount. The user we’re using to configure our organization is a big liability because it effectively has administrator access to everything so we don’t really want to be using it for day-to-day infrastructure provisioning.
resource "aws_iam_user" "terraform" {
  provider = aws.child
  name     = "Terraform"
  path     = "/"
}

resource "aws_iam_user_policy_attachment" "terraform" {
  provider   = aws.child
  user       = aws_iam_user.terraform.name
  # You might want a narrower policy than this...
  policy_arn = "arn:aws:iam::aws:policy/AdministratorAccess"
}
The code above grants full administrator permissions to the Terraform user, which—while convenient—is far from the security best practice of applying least-privilege permissions. In practice you’ll want to tighten up the permissions granted to the Terraform user so that it only has the permissions needed to administer your infrastructure—there’s no point in the Terraform user having the ability to set up ElastiCache clusters if you don’t intend to actually use that service, for instance.
At this point you are truly done—you’ve got an AWS organization with subaccounts, AWS SSO set up with a user for yourself and anyone else you might work with, and all of your subaccounts have been initialized with useful baseline infrastructure that will make bootstrapping your application much easier.